1) MsgBox("My Message")
Or
2) Messagebox.Show("My Message", "Caption Information", Button Options, Icon Option, Default Button, Messagebox Options)
Generally you will only need a few of the options in the messagebox.Show(Options). All depending on what you want to do. I have only ever used the first three options but here is my explanation of the uses:
- My Message = This is simply the message you want to display. The data type is string.
- Caption Information = The information you want to display in the blue top bar of the message box. The data type is string.
- Button Options = To get the button options put a comma after the caption and press space bar, a list of options will appear. These give you options for the types of buttons you want such "OK" only or "OK" and "Cancel" etc.
- Icon Options = As before type a comma then space after the button options to give you the list of icons. you will have options such as information icon, error icon, exclamation, none, stop etc.
- Default Button = This will allow you to select a default button if you have two or more buttons.
- Messagebox Options = This covers various options you will not be too concerned about if you are a beginner. I have not come across a time when I have used these options so feel it would be best not to go into this just now.
The first message box option (1) is carried over from VB6 and can be used in VB.NET as well. As far as I am aware it doesn't have the options available that messagebox.show has.
Lets show a messagebox on my experimental form. We will use a button to bring up the messagebox so you can simply use a new project or just a form as i am using for different exercises.
1) So if you open your project (Or a new project) and place a button really anywhere on the form.
2) Click once on the button
3) Go to the properties of the button
4) Set the Text property to "Show Message box", without the quotes of course.
5) Expand the button design width so you can read the text on it
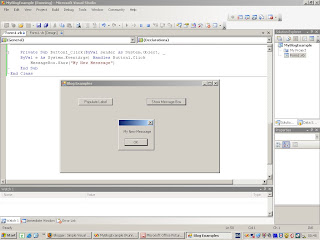
6) Double click on the button and you will get a button click event showing in the code as below
7) Put in this code:
Messagebox.Show("My New Message")
8) Save the project
9) Run the project and click the new button "Show Message Box"
10) You should see the messagebox as below:
As you can see there isn't much too it. Lets now add some more stuff to it to make it more interesting:
11) In you code add this:
MessageBox.Show("My New Message", "Show Message Box", MessageBoxButtons.OKCancel, MessageBoxIcon.Information)
Can you see what the new options are doing now?
12) Say you wanted to have a large message with breaks in the text you would use the following VB operator:
vbCrLf - Put this wherever you want a breakline in a message or string of text. You have to open and then close the quotes to put it in like this:
"I have a really long message " & vbCrLf &
"that I want to break into smaller " & vbClRf &
"lines so I use this technique"
The '&' is used to concatenate the strings together. The physical line breaks are only shown for illustration purposes. You could put all this code on one line. So here is how the message box looks now:
Remember to experiement with different options so you know what they do and how to use them.


No comments:
Post a Comment